Before you start on maven I would suggest you to read this book Better Builds with maven available for download at maestro dev and also refer to Apache maven
I used Eclipse Helios with Maven2 Plugin installed for setting up this project (You can use nexus Sona Type to manage your maven repository, I use their community version and it seems do the job for me).
To check if maven plugin is installed in your eclipse go to Window ==> Preferences

To check if maven plugin is installed in your eclipse go to Window ==> Preferences

I do need to stress the fact that my blog is more geared towards creating maven project using eclipse (you can easily do the same from command line). I think the m2 plugin editor has lot of features that makes it worth while using the m2 editor to set up the project
Create a new workspace (I would expect you to know how to create a new workspace)
Step1: Create new dynamic web project (New ==> Other ==> web ==> Dynamic Web Project)


Step2: Click Next and Add source folders as below

Step 3: Change the web content directory name as below

Step 4: After you click on finish to create a pom.xml file, Enable Dependency Management as shown below

Step 5: After enabling maven the directory structure of your project should look some thing like this

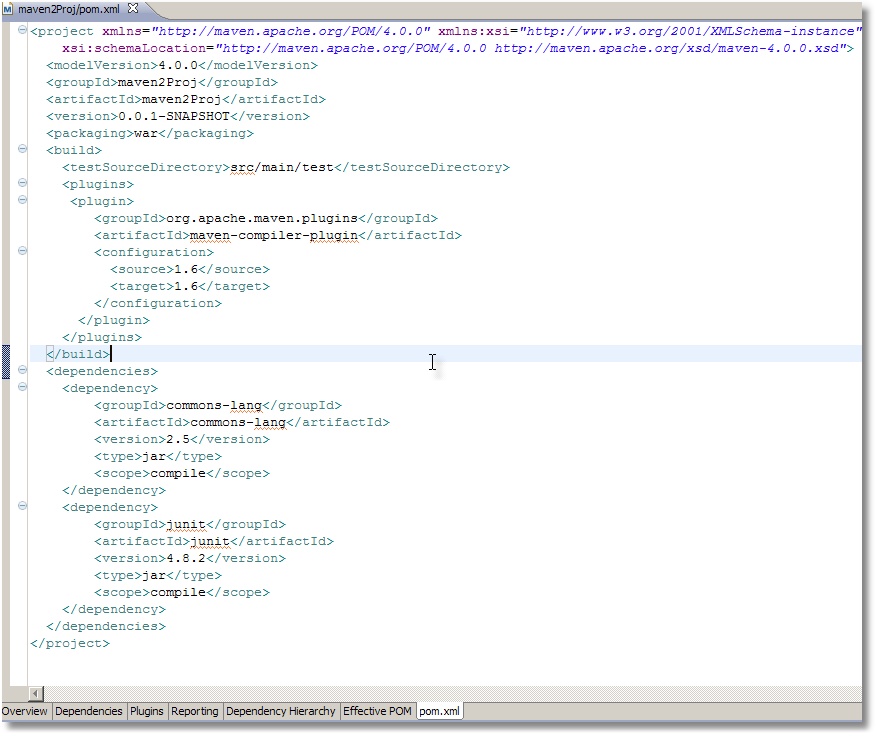
If maven2 eclipse plugin is installed in eclipse, when you open pom.xml, It will be opened in m2 plugin editor as shown below

To add a dependency go to Dependencies tab on maven pom editor, Click on Add it will bring up browse menu, You can browse and add Jars as below

To add a plugin go to Plugins tab in pom editor, You can browse or add plugin by clicking on Add button as shown below

Once you added all the dependencies and plugins that you need, You can verify the pom.xml, go to pom.xml tab on pom editor as shown below
Once you are done building and verifying pom file, Your project is essentially ready to use maven pluigins to compile, test and build an artifact etc..
To create a maven artifact run maven install as shown below

The results after maven install run, looks for Build success as below

The target (build output) directory after a maven build as below, You can see the artifact war file is created that is ready to be deployed

To update project class path file with all the maven dependencies from pom file
- Select mave2Proj ==> Left Click Mouse ==> m2 Maven ==> Update Project Configuration
- Go to Window ==> Preferences ==> Maven ==> Pom Editor ==> Select the check box show advanced tabs in the pom editor
I hope this helps you with your maven Journey.